Lighten PDF to Excel Converter for Mac helps you quickly and accurately extract data from PDF to Excel Spreadsheet.
Quick start:
Step 1. Launch PDF to Excel Converter
After downloading, open .dmg file and drag the app icon to ‘Applications’ folder. Double click on the icon in the Application folder to launch PDF to Excel Converter.
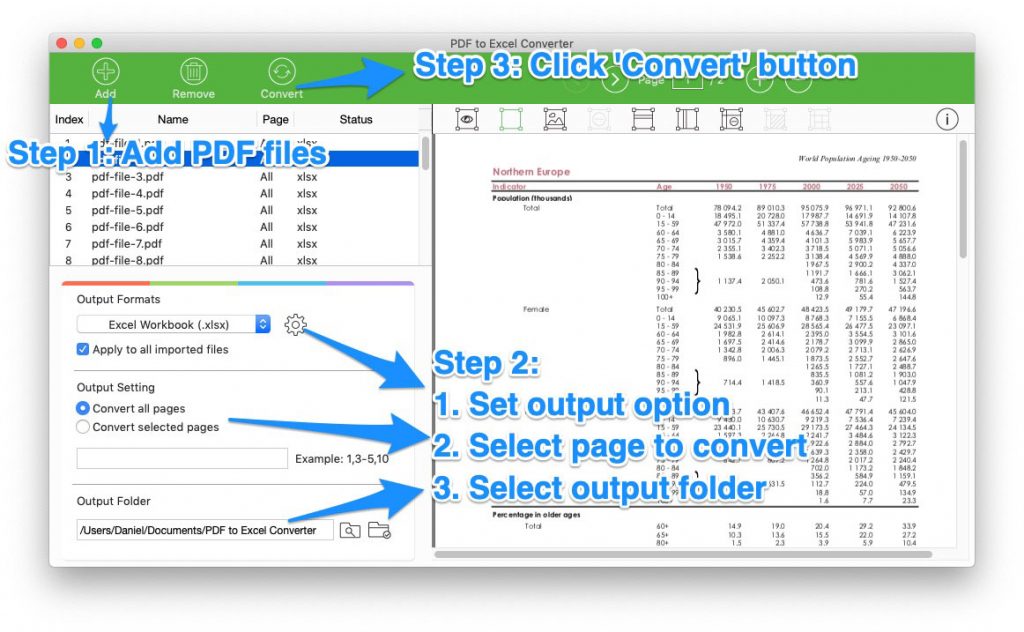
Step 2. Import PDF files
Click ‘Add Files’ button to browse your finder, select the files you want to convert.
Step 3. Select output option
Click ‘Setting’, you can customize output options. Set an output folder to store the output file.
Step 4. Click ‘Convert’ button
Click ‘Convert’ button, the conversion will begin instantly. Go to the output folder to find the converted file, or open the output Excel file by clicking on the hyperlink in file list.
Advanced Conversion Skills
PDF created by Microsoft Excel with table data can be extremely complex, and the style and formatting may be quite different. In order to convert any types of PDF table to excel, you can mark a table or field manually.
Choosing the right option for certain PDF document
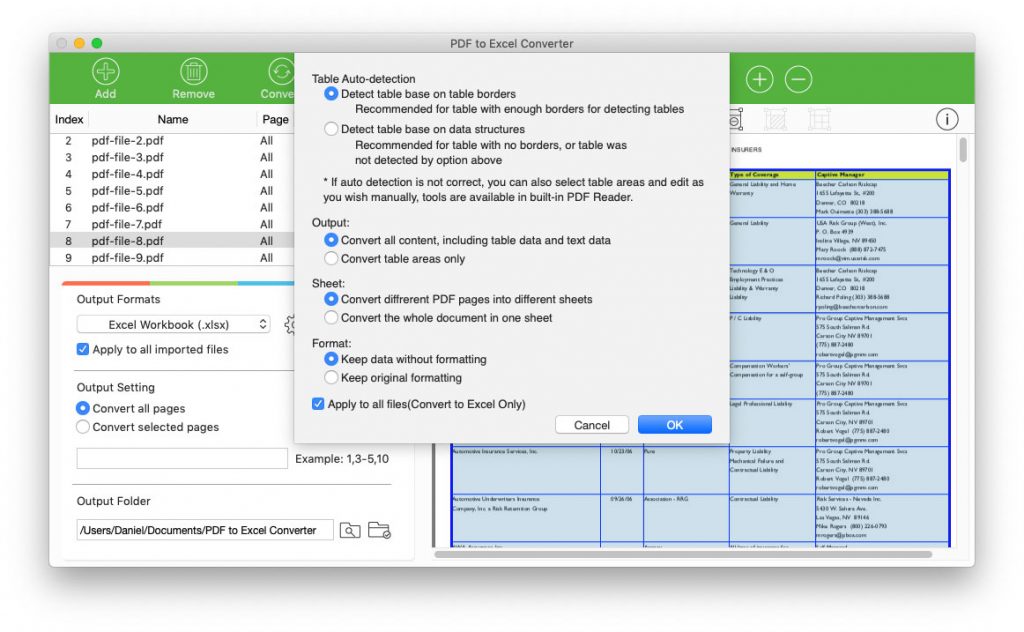
If the table has full or partial borders
Go to ‘Setting‘, select ‘Detect table base on table borders‘.
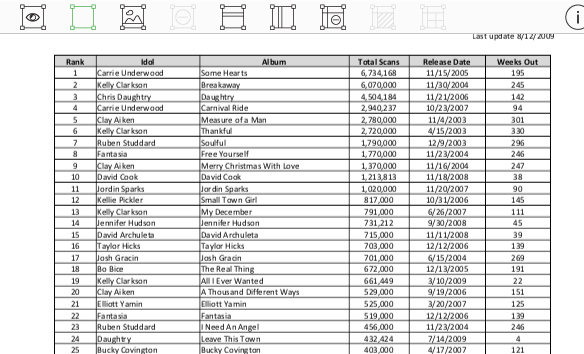
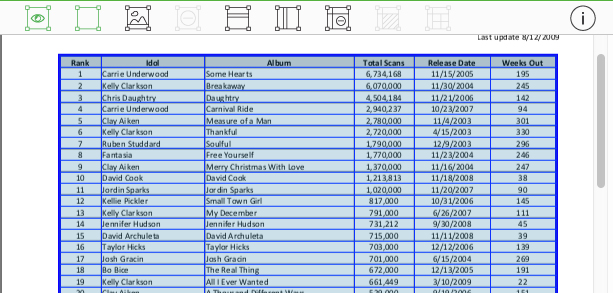
Table with borders Click ‘Show table‘ button in built-in PDF Reader toolbar. The app will show the table automatically. Table will be covered by blue color box, borders will be displayed as blue lines.
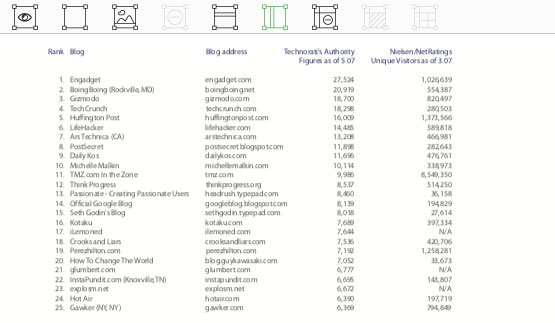
If the table does not have any table borders
The app will not detect table automatically in ‘Detect table base on table borders’ mode. You need to manually mark table areas.
Manually mark table area
After finding table elements, you can mark it manually for accurate conversion.
1. Place your mouse cursor on the built-in PDF file, press left mouse click and keep it.
2. Drag the cursor from top-left corner to the bottom-right corner to cover the whole table. While dragging you will see blue color box. If you didn’t mark the element accurately you can change its size or position by selecting the marked areas.
3. When you release the left mouse click, PDF to Excel Converter will perform table recognition to the selected areas, adding rows and columns lines to it.
Or you can go to ‘Setting’, click ‘Detect table base on data structure‘. PDF to Excel Converter will divide the table lines and columns base on the data position. This is a fully auto table detection, marking table manually in PDF reader will not affect output file in this mode.
Modify Table Areas
Lighten PDF to Excel Converter will automatically attempt to detect where the rows and columns are when you mark a table area. But for some table with complex table structures, you might need to modify the lines for accurate results. In this case, you can adjust the rows and column lines, merge or split cells.
All the tools for making change to the table areas are on the toolbar and the right-click context menu.
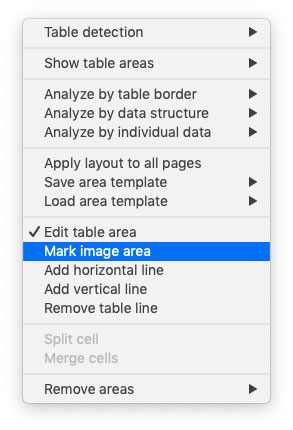
Add lines to add columns and rows to the table areas
If some rows and columns are missing, you can click ‘Add the horizontal line’ or ‘Add the vertical line’, and then move your mouse cursor on the table, move to the place you want to add line and press left mouse to place the line.

Adjust the table lines
If you want to move the position of lines, place your cursor over the line, the cursor will change into a double head arrow. Press and hold your mouse left click and drag the cursor up/down, left/right to adjust the line position.

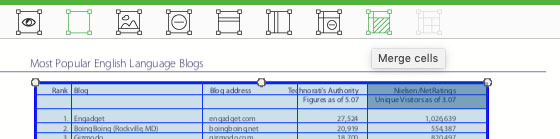
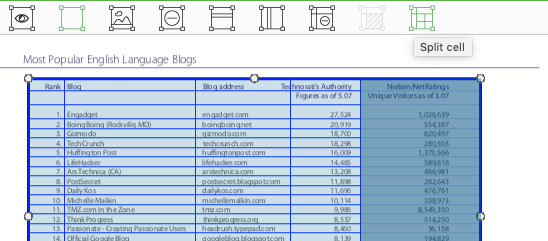
Merge and Split cells
After marking the table area, you can select cells in the field you mark. Click left-click to select a cell, hold and drag the mouse cursor to select multiple cells, click ‘Merge cell‘ button to merge cells you selected into one cell.
If you want to split a cell into multiple cells, select that cell and click ‘Split cell’.
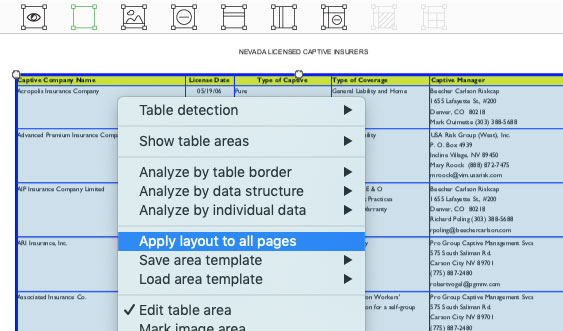
Apply table layout to all pages
If the tables in all pages have a similar table structure, you can make the table area in one of the pages, and click ‘Apply layout to all pages’ in the right-click context menu. The table area will be applied to all the pages. Then you can save more time without marking table areas on all the pages.
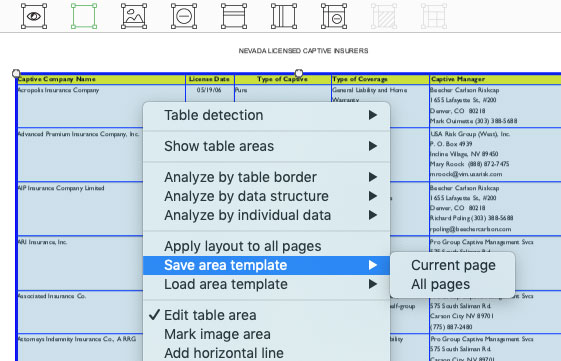
Save and load layout template
In some cases, if you have lots of PDF files which have a similar table structure, after marking table for one of the file, you can save the table layout as a template file. When you need to apply the layout to another file, click ‘Load area template’ and select the saved template. The table layout will be applied.
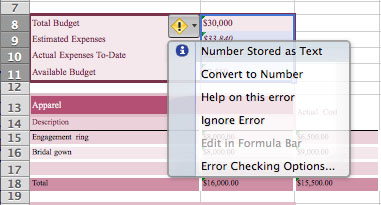
Other issues
In the output file, if you find there’s a little green triangle at the left-top corner, that means Excel doesn’t know the cell type. Move your cursor over that cell, you will get a notice sign. Click on it and click ‘Convert to number’, then you can calculate data without problems. You can select the whole columns or multiple cells then convert all cells to number at one time.